Once the CNC machine is build and making chips, the need for neat and accurate cabling arises. Indeed, nobody wants his machine to cut its cabling during operation.
Initially, I have fixed the cabling using cable ties holders with a double-sided tape. This proved unreliable because the double-sided tape did not last long and let go finally. I decided to start with a cable carrier for the X-axis, because making it neat and accurate seemed straightforward: put the wires into the cable carrier.
I have browsed through available models and almost decided to buy one cable carrier chain but at 40$/meter it seemed a bit pricey. Suddenly, while wandering through cnczone forums, I had found a very interesting thread about DIY cable carriers and decided to make my own instead of buying a ready-made one.
Click on the pictures to enlarge.
|
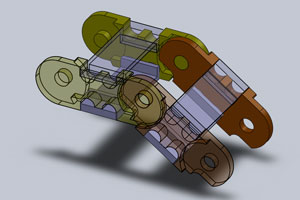
First, I had to choose the particular design from the quite a few in the thread. I decided to use the Gerrys (ger21) type (I believe he modeled it after some IGUS chain), which is further adjusted by Pablo (PEU) for milling with just 1/4" endmill, since original design called for both 1/4" and 1/8" endmills. The chain consists of two types of links that mate together. You can clearly see this on the picture. |
 |
|
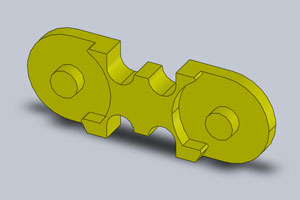
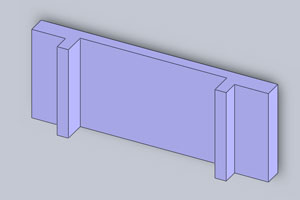
Here are the three types of pieces needed for the cable carrier.
The modifications I made to the models were:
|
Part A:
Part B:
Part C:
|
|
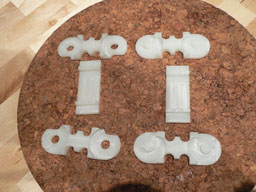
Here are the actual parts. I have picked some very cheap scrap polypropylene and used it for my cable carrier. Some notes on the material though. It is important to keep in mind, that the parts do not have any locks that hold the assembly together. Thus, you either rely on a tight fit to hold the assembly together, or need to glue the parts. I thought that friction forces would be strong enough to hold the cable carrier and not let it fall apart. However, this was not true - the assembly turned out to be quite sensitive and not rigid enough. So I had to glue the parts together. Now, polypropylene is not easy to glue. One needs a special glue that will work with it. That was a moment when I regret I had used polypropylene. I should have used polyethylene instead, and then I could have bonded it together with a plain acetone. Since I did not have any special glue for polypropylene at hand, I used superglue (cyanoacrylate) which somewhat worked. However, I may have to use a special glue if the superglue will not work adequately. |
|
|
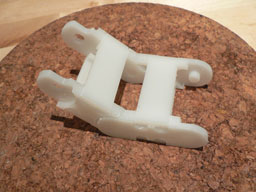
Here are the assembled links of the chain. |
|
|
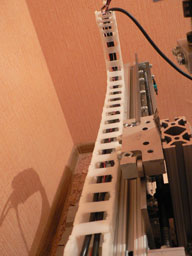
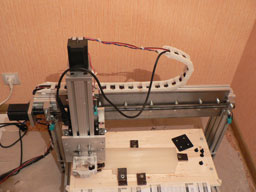
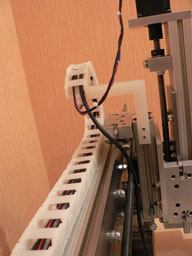
Here is the cable carrier installed on my CNC machine. I have finally found the way to mount my new cable carrier: I have made some custom T-nuts for 80/20 aluminum extrusion. They turned out very nice and were easy to make. I will post a new project, where I describe how these T-nuts are made. I wish I could have made my cable carrier from the black plastic... Anyway, the cabling is much nicer now! |
|
|
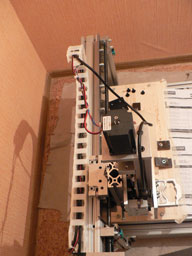
Here is the last modification to my DIY cable carrier. If you look closer at the previous pictures, you may notice, that wires to stepper motor are strained. This is because they transmit the motion of the Y-axis to the cable carrier. Obviously, this is no good, and I decided to fix the cable chains end relatively to the Y-axis. I have machined an L-shaped plastic piece that attaches to the 80/20 extrusion at one end and to the cable carrier at the other end, and thus transmits the motion from the Y-axis to the cable chain. As a result, the cables are not strained any more, as you can see on the picture. |
|

Pablo kindly allowed me to host the SolidWorks files. You can download the models for DIY cable carrier here.